Saturday, December 19, 2009

Charcoal Drawing Info


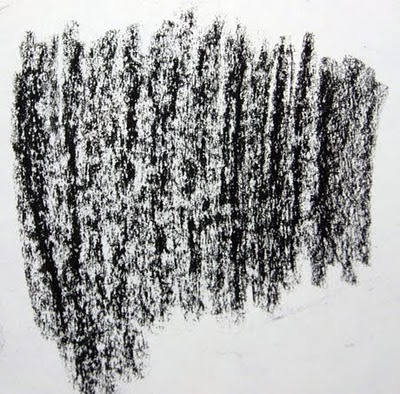
Charcoal is probably the oldest, or one of the oldest, art materials. It was, after all, what our pre-historic ancestors used while drawing on cave walls! It's ease of manufacture and use make it an essential tool for all artists. Charcoal is an impure form of elemental carbon made by burning selected woods in anaerobic conditions (little or no oxygen), hence, it is chemically fairly simple and stable over millennia. While other art materials may have greater color saturation than charcoal, few will last as long!
The major disadvantage of charcoal is its tendency to "dust-off." Not a problem when drawing on cave walls, where there is little air-movement to blow it off, but certainly an important issue if you want to display it in your home! During the many millenia between cavemen and modern times, charcoal was only used for preliminary sketches, and then painted or drawn-over with substances that can withstand a greater amount of physical handling. Only fairly recently, as people have begun to frame drawings behind glass or spray them with fixative, has charcoal recovered its earliest use as an expressive medium in its own right.
The joy of using charcoal as a drawing medium lies in its spontaneity and sensitivity. One can make marks with it which are very painterly, as if with a brush, or one can make fairly technical drawings. Fluid, painterly drawings are best achieved with the softer, richer crayons, whereas detailed drawings are best with harder ones, especially charcoal pencils.
Graphite pencils are, in my opinion, more limited than charcoal in terms of the range of values they can create. Graphite can rarely achieve as dark a color as charcoal, and it has the undesirable tendency to become shiny upon repeated application.
Graphite is actually a much more pure form of elemental carbon than is charcoal. Its amorphous crystalline structure gives rise to its special properties. Modern graphite pencils are scarcely ever made of pure carbon, however. Instead the graphite is ground to a very fine powder and mixed with clay, and then fired, to create a matrix which is strong enough to withstand the physical distress of drawing. (This is similar to how pastels are made.) Often pencils are also impregnated with some wax to improve their smoothness. Obviously, the quality of a pencil is determined by how much, and what kinds, of clays and wax are used in proportion to the quality graphite.

Friday, December 18, 2009

Sketching Lines Composition Using a Pen.


Knowledge and the skill of sketching lines using a pen is necessary because they have their own special characteristics depending on the types of pen, the thickness of the tip and the ink used. An artist or designer has to be smart choosing the thickness of the pen tip to sketch because the‘mood’ created by the different thickness of the lines are not the same.

Sketching Lines Composition Using A Pencil


Lines using pencilthe lines created using pencil have their own characteristic that need to be understood by an artist or designer. The nature of the lines are softer compared to the sketch using a pen. There are two grades of pencil which are the soft (HB until 9B) and the hard (B until 8B). the creating of a good quality pencil line could be done through the skill controlling the pressure (weight) of the pencil into the sketch sheet. An artist or designer need to know how to combine different line using different pressure in order to get awesome sketch. Besides that, the way of holding a pencil and using the right type of sketch sheet could influence that quality if sketches.

The Concept Of Lines In Sketching

The concept of lines in sketchinglines are significant elements in any sketches. It derives from dots which eventually become a stretch of along lines. Lines will influent the quality of a sketch created. The knowledge and skill about the concept of lines is pivotal where each types of line will give a different effect on a sketch.

Vertical Lines


Shadow Casting


Section


Plant Symbols


Plan & Roof Plan


Patterns


Orthographic Drawing 2


Orthographic Drawing 1


Orthographic 2


Horizontal Lines


Letter


Axonometric


Example Of Fast Figure Can Be Used


Sketching in 3-D Figures 'imaginary box'


The skill of sketching figures in 3-D shapes will definitely assist the artist or designer to be more confident with sketches to be create, provided that they are associated with figure. The sketches techniques figures in 3-D shapes demands a vivid focus of the mind to be able to understand the movement and the surface on the organ involved. The focus is necessary to ensure that the sketch to be produced is perfect and of superbly quality. The sketching techniques of 3-D figures too used the ‘imaginary box’ as the fundamental guidelines in creating fabulous figures.

Sketching 2-D Figures 'imaginary box'


The next level that required to be polish is the technique of sketching 2-D figures is important for an artist or designer to assist him or her in better understanding of the space sketched. In this context, an artist or designer does necessarily sketching figure in detailed and complete shape but just enough to understand and make himself or herself skillful in sketching in figure roughly and sufficient to convey a message on the sketch composition itself.

Sketching 3-D Complex Objects


Sketching quality 3-D objects is the goal of every artist or designer because it is the beginning of accomplishment for the next level. The ‘imaginary box’ technique is being used but required more focus from the mind to ensure the sketch of it high quality. The mind focus is requisite in order to imagine the status of the object and its surface in 3-D shapes will be intention that the process of sketching on the sketch sheet could be done perfectly well.

Sketching 3-D Basic Objects


Sketching basic 3-D shapes in the next stage that’s need to be done to ensure the skill of sketching is continuously sharpened in the next higher level. To sketch basic object in 3-D, it necessary to understand each objects to be sketched begin from an ‘imaginary box’. This box will be guidelines for the artist or the designer to realized his or her imagination.

Sketching 3-D Complex Shapes


The skill of sketching 3-D shapes is pivotal to create excellent sketches. The understanding and the used the right techniques will certainly help in producing a high quality sketches. At this seventh stage an artist or designer are required to imagine each surface on the 3-D shapes vividly using mental power. This process may seem difficult but provided with a good understanding and with the right practice following the given concept, definitely you will be success.

Sketching 3-D Basic Shapes


The sixth stage is sketching the 3-D. at this stage level an artist or designer needs the understanding in creating a shapes in 3-D. this not to be worried as the example given will give the guidelines of how to form a good basic 3-D shapes. Before embarking on this level , please be ensure that the previous skills learned and practiced before this is mastered superbly well. This is vital as it will assist in understanding the skills at this level and also for the next ones.

Sketching 2-D Complex Objects


At this stage an artist or designer need to sketch complex object in 2-D. this process is similar with the process of sketching basic 2-D objects. But at this stage an artist or designer needs to used the skill and the strength of the mind in order to understand profoundly about 2-D sketch to alleviate the process. The strength of the mind is required to imagine the situation of the object in 2-D. it will be easier if the techniques are practiced for a number of times.

Sketching Basic 2-D Objects


The fourth is where the artist or the designer needs to sketch in 2-D. the sketch technique in 2-D will help an artist or designer in understanding deeply about the concept of surface and lines for each sketch produced. This technique of objects sketch will used the concept of ‘imaginary box’. This basic concept will ease the artist or designer in understanding and mastering the skill of sketching 2-D object better.

Sketching Complex 2-D Shapes


The third stage is the skill of sketching complex 2-D shapes. At this stage, both skills learned on stage one and two should be mastered perfectly well. Although this may seem simple and easy to be sketch, the actual reality of producing something of an excellent quality required appropriate basic skills.

Sketching The Basic Shapes Of 2-D


The skill to sketch the basic shapes of 2-D is the second phase that need to be understood and practiced. This skill is really need to ensure to next stage could be mastered within a short period of time. To sketch superbly confident is required.

Basic Skill (Lines)


Sketching is a basic skill that could be sharpened if the fundamental aspect are understood and practiced consistently.

Sketching lines
The skill of sketching quality lines is one of the factors the help to produce a good sketch. It may sound easy but some specific skills are needed to attain a fine line. Among the skills is holding the pen or pencil correctly.

The practice of sketching
The practice of sketching various types of lines is necessary to ensure the sketch produce is of the superior quality. Even though this may seem simple, it require simple concentration and confident to be able to produce quality lines. If each line sketched is observed carefully they all have specific categories that need to be understood by the artist or the designer.

Importance of Sketching

Sketching is used to speed up visual problem solving. Sketching can generate many options very rapidly. Drafting prior to making a list of sketch alternatives can result in poorly conceived products. Sketches are important communication tools. A drafted drawing implies a more advanced state of planning which

Drawing Tips - Top 10 Mistakes Beginners Make

Because drawing is often self-taught, you tend to keep making mistakes much longer than when a teacher is available to help. Here are the 10 most common mistakes beginners make when they learn to draw. Some big, some small, all fixable. Check and see whether these errors crop up in your drawings, and get some tips on fixing them.

1. Drawing With a Hard Pencil
If you have no very dark shadows and the whole picture is rather pale, check your pencil. Are you using a Number2 (HB) pencil? These are too hard to draw with (though they are handy for light shading). Get a B, 2B and 4B for darker values. Read more about pencil grades.

2. Portraits from Flash Photography
This is the major cause of beginner drawing problems. Using flash photography flattens the features, giving you nothing to work with. When the person is facing you, it is very hard to see the modeling of the face, as the perspective vanishes behind their head, and add a cheesy snapshot grin and you make life very hard! Have the person turning slightly to one side so you can model their face, with natural lighting to give good skintones, and a natural expression to show their real personality.

3. Incorrect Head Proportions
Because of the way we focus on a person's features, we usually draw them too big and squash the rest of the head. Learn about the correct head proportions

4. Twisted Features
Because we are used to looking at a person straight-on, we naturally try to make their features look level when we draw them. If their head is on an angle, this results in strange distortions in the picture. Sketch guidelines first to ensure that the features are on the same angle as the rest of the face. Learn more about drawing the human head.

5. Pet Drawings from Human Eye Level
When you take a photograph standing up, you are looking down at your pet. They have to look up, and you end up with their head seeming much bigger than their body, and a rather odd expression on their face. Have someone distract them so they aren't staring down the lens, and squat down so the camera is at their head level, and you'll get a much better reference photo. Read more about pet photography for drawing.

6. Being Afraid of Black
Often when shading, the shadows don't go past dark gray. If your value range is restricted to in some cases half what it ought to be, you are limiting the modelling and depth in your drawing. Put a piece of black paper at the corner of your drawing, and don't be afraid to go dark. Really dark. Improve your range of tone.

7. Outlining in Value Drawings
When value drawing, you are creating an illusion with areas of tonal value. When you use a hard drawn line to define an edge, you disrupt this illusion. Let edges be defined by two different areas of tonal value meeting. Read more about Value Drawing.

8. Drawing on the Wrong Paper
If your drawing is pale, it might be the paper. Some cheap papers have a sheen on the surface that is too smooth to grab the particles off the pencil. A thick notepad has too much 'give' under the pencil to allow you to apply enough pressure. Try a basic photocopy/office paper, or check the art store for cheap sketch paper. Place a piece of card under a couple of sheets to give a firmer surface. If you are trying to do even shading, some sketch papers can be too coarse, giving an uneven texture. Try a hot-pressed Bristol board or similar smooth drawing paper. Find out more about paper

9. Scribbled Foliage
Don't use circular scribbles to draw foliage. Use more convex shaped scumbling - like crescent shapes and scribbly calligraphic marks - to draw the shadows in and around clusters of foliage, and your trees will look much more realistic.

10. Wiry, Pencil-Line Hair and Grass
If you draw every hair or blade of grass as a pencil line, you'll end up with a horrible, wiry, unnatural mess. Use feathery pencil-strokes to draw the shadows and dark foliage behind areas of grass - just like drawing short hair in this drawing hair tutorial.

(Source by - http://drawsketch.about.com/cs/tipsandideas/a/drawingmistakes.htm )

Learning How to Shade and Shadow


Shadowing and shading are important techniques because of the extra detail they add to a picture or painting. The key to being successful when shading is to always have a point where the sun is shining from.When you shadow you should always draw a fine outline. That is a key to shadowing. For shadowing most people hold their pencil or other item differently. If you hold your pencil, like when you write, it will be easier to add more detail. Detail is more important in areas such as, painting, pastels and clay. Another key to shadowing is to make sure that you have almost a perfect outline of your figure before you start shadowing. Then after you make an outline you can start to shade in the outline lightly. Once you’ve done that you’re practically done except for the extra detail you want in your picture like houses, trees, mountains, etc.

Learning Perspective Drawing

One Point Perspective

Two Point Perspective


Perspective also deals with shadowing. There are two types of perspective, one-point and two-point. In perspective you have to draw the vanishing point. This is a dot placed in any part of the picture that shows where the horizon ends. Then the key is to line everything up with the vanishing point. Draw very lightly, because some of it won’t be in the picture. That tip will save your eraser and time. Curving the lines in a picture will also make it look more like a camera shot, which gives a more realistic feeling to your picture.

An Introduction to Drawing and Sketching


Drawing is similar to writing in that it's necessary for a student to master it to convey his/her ideas.You must learn to draw if you want to express yourself artistically. There is a lot to learn, but if you approach it from the "fun" side, it won't be tedious.A student who draws well is free to concentrate on the problem of paint and color.Not knowing how to draw can be a constant stumbling block at every stage of painting.There are artists who have gotten away with mediocrity in their skills, and who are able to hide their lack of drafting abilities with beautiful colour.However, not many of us are naturally gifted with such an eye for color!The good thing is that you don't have to sit in front of a naked model to learn how to draw (unless, of course, you want to do that!).Rather, I think that a better way of learning to draw is by constantly sketching and observing your surroundings .I believe you can master enough of the skills of drawing by constantly sketching to help you in learning how to paint.If you want to learn to draw, then, your motto should be "Sketch at All Times" and learn to draw with basic forms.You can sketch things around you: kitchen utensils, furniture, the view from a window, people at work and at play, pets, etc.Vary your sketching, working sometimes in outline, stressing the contour aspect of drawing. At other times concentrate on light and shade. The main thing for your is to keep drawing. And you should also learn a bit about perspective. There are 2 secrets on how to draw perspective that you can learn to start mastering that very important area in the art (and science) of drawing.And if you want to learn to draw people, this brief introduction to figure drawing, will give you a good start. I do hope you enjoy the process of learning how to draw and how to sketch.

( Source by - http://www.learn-to-draw-and-paint.com/drawing-sketching.html )

Introduction to Sketching

Sketching, whether rendered with pencil or brush, is an essential skill in the learning development of any artist. All the equipment you need to carry, aside from a pencil or a pen, is a sketch pad. For general landscape sketching a medium-soft pencil can be used. All the necessary shading can be accomplished by using the pencil on a fairly smooth paper. I suggest that you work on a 9-x-12-inch pad. This size will allow you to produce anything from a small 2-x-3-inch compositional note to a detailed study on the full sheet. By using a smooth paper you can work faster, delineate fine details, and obtain broad, velvety black effects. In addition, you will find the smooth-surfaced paper more receptive to pen and ink. The 9-x-12 pad is recommended for recording landscape compositions, impressions, and studies, and a smaller pad that can be conveniently slipped into the pocket and carried at all times is useful for sketching figures. By figures I mean people at work, at play, walking, sitting, and so on. This type of sketching serves two purposes: first, the constant practice will improve your drawing; second, the figures can often be incorporated into your paintings. However incidental they may be in your painting, they will lend an authoritative note if they were originally sketched from life. For drawing the figure in the classroom or studio, charcoal is undoubtedly the best medium for serious study. However, the fact that charcoal has to be sprayed with a fixatif to keep it from smearing does not make it as satisfactory a sketching medium as pencil or pen. Sketching with Pen and Ink will come later on. But if you can't wait, you should read the articles entitled "Should You Sketch with a Brush?" and "Sketching with a Brush in 3 Simple Steps", which I've included in this site for you.

(source by -http://www.learn-to-draw-and-paint.com/sketching.html )